
ProRes Video Encoding with ffmpeg on Windows

How to Encode ProRes Videos with ffmpeg on Windows
This is a simple workflow how to get a ProRes Moviefile from a Adobe Premiere Edit running on Windows.
Software used
- Adobe Premiere for Windows (at least version CC 2015 reccommended)
- ffmpeg Commandline Video Encoder for Windows
- Magellan Explorer (or any other batch processing capable File Manager)
Movie Encoding Workflow
- Exporting DNxHD / DNxHR 10-bit movie from Premiere
- Exporting DNxHD / DNxHR 10-bit movie from Premiere
 Premiere Export – choose DNxHR/DNxHD MXF OP1 |
 choose DNxHR or DNxHD HQ 10-bit |
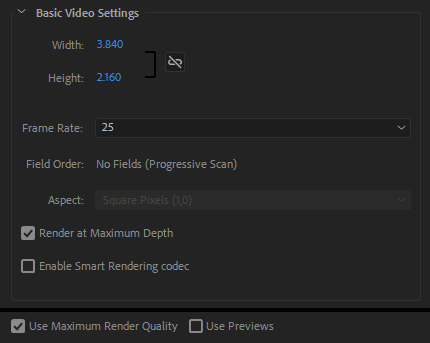 check Render Maximum Depth for 10-bit and check Maximum Quality |
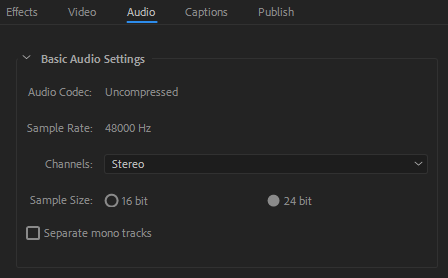 Audio Parameters |
ffmpeg ProRes Encoding commandline
We use the -c:v prores_ks codec, which is best compatible to the original ProRes codec.
ffmpeg.exe -i inmovie.mov -c:v prores_ks -profile:v 3 -pix_fmt yuv422p10le -c:a pcm_s16le -b:a 48000 ProResMovie.mov
Sometimes audio mapping is necessary to bring in all audio channel from the source file.
The example below maps 4 mono channels to the ProRes movie:
ffmpeg.exe -i inmovie.mov -c:v prores_ks -profile:v 3 -pix_fmt yuv422p10le -c:a pcm_s16le -filter_complex „[0:a][0:a][0:a][0:a]amerge=inputs=4[aout]“ -map 0 -map „[aout]“ -b:a 48000 ProResMovie.mov
The ProRes profile can be defined with the paramaters below:
ProRes Parameters
-profile:v 2 ProRes LT
-profile:v 2 ProRes 422
-profile:v 3 ProRes HQ

 English