
Best Canon XC10 Tips & Tricks
Category : Workflow

Best Canon XC10 Tips & Tricks
- Set the aperture to 5.6 or above and the aperture won’t change when zooming in and out!
- Parfocal Lens: Zoom-in, focus on subject, zoom out.
- Set the programm wheel to M for manual settings for aperture, shutter and ISO.
- Custum Button Layout 1: Peeking, 2: ND Filter, 3: Push Autofocus
- Set the handgrip wheel wheel to ISO for quick exposure adjustments instead of aperture
- Quick Menu most important functions order: Iris, Shutter, Zebra, White Balance, ISO
- Set Picture Looks to settings below.
- Use cheaper CFast 1.0 cards from Atomos when recording 4K, no need for the much more expensive CFast 2.0 cards!
- If the CFast 1.0 card is not working, try to low-level format it, then it should work.
- If the CFast 1.0 Cards still not working for you, good news is price for CF2.0 card are going down (see below)
- Enabling Face detection also enables touch to focus function which not only tracks faces, but also objects!
- Recording 4K with 305mbit gives you superiour quality and less artifacts in fine detail than 205mbit
- The XC10 can record 100fps (PAL) and 120fps (NTSC) as 720p in HD mode via Slow & Fast Motion Menu (1/4 speed)
- You can record great and easy Timelapse via the Slow & Fast Motion Menu (x2, x4, x10, x20, x60, x120, x1200)
- Don’t forget to set the program wheel to M (Manual) when recording Timelapse (except for sunsets & sunrise set to AV)
- Quick access to Picture Looks menu: While on FUNC press Handgrip Joystick -> move to left side of Q-menu -> press once, then select desired Look (press joystick up to access settings for Look)
- When filming in HD, set Picture Look sharpness to 2, in 4K set it to 1.
- Better expose to the right with the XC10, meaning expose to the brightest elements in the scene, because the XC10 tends to be a bit harsh in very bright highlights and blacks are very nicely saved.
- Stay below ISO 5000, 5000 and above softens the image to much.
1. Picture Looks settings for optimal dynamic range
| Picture Look #1 Standard Good for bright scenes. Good highlight preservation, good shadows. Can be graded nicely. |
|
|---|---|
| Sharpness | 1 |
| Contrast | -4 |
| Color Depth | -3 |
| Picture Look #2 EOS Std. Good for darker scenes. Higher contrast, deeper shadows. Same as Canon DSLR EOS Std. |
|
|---|---|
| Sharpness | 1 |
| Contrast | -4 |
| Color Depth | -3 |
| Picture Look #3 Wide DR Very bright midtones & shadows and highlight preservation. Same as Canon C100/C300 WideDR |
|
|---|---|
| Sharpness | 1 |
| Color Depth | -2 |
| Picture Look #4 Cinema EOS Std. Brighter shadows, less highlight preservation. Same as Canon C300 MkII Cinema EOS |
|
|---|---|
| Sharpness | 1 |
| Contrast | -4 |
| Color Depth | -3 |
Price is going down for CFast v2.0 Cards
| Subscribe to our Newsletter and get a special discount for our Webshop and a LUT Gift Package! |


Related Posts on NTown's Blog
 List of most popular Canon, Sony, Panasonic camera Base LUTs
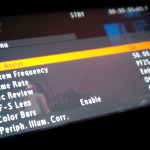 Canon EOS-C100 Tips Collection
 Canon Cinema EOS C100/C300 Custom Picture Styles
 Canon XC10 ISO Test
 Patrick’s Filmemacher Buch Empfehlungen
 Drift – Music Video Shoot – Behind the Scenes
 NTCLOGc – Alternative c-log Custom Picture Style for Canon C100/C300

 English